Showing posts with label Crochet. Show all posts

Easy Crochet Rose Flower Pattern For Beginners 🌺


EASY CROCHET SQUARE MOTIF MAKING


Uncover the joy of crochet with our easy-to-follow guide to creating charming crochet square motifs. These delightful little squares can be the building blocks for a myriad of projects, from blankets and scarves to vibrant wall hangings and beyond.

Materials You'll Need:

  1. Yarn: Choose your preferred colors and textures. Opt for a soft, medium-weight yarn for beginner-friendly stitching.
  2. Crochet Hook: Select a hook size that complements your yarn. A size G or H (4.0mm - 5.0mm) is typically suitable for most medium-weight yarns.
  3. Scissors: A trusty pair for snipping yarn.

Easy Crochet Square Motif Pattern:

Note: This pattern details a basic crochet square that's perfect for practicing your foundational crochet
skills.


Round 1:

  1. Make a magic circle.
  2. Chain 3 (counts as your first double crochet), work 2 double crochet stitches into the magic circle.
  3. Chain 2, and work 3 double crochet stitches into the circle.
  4. Chain 2, and work 3 more double crochet stitches into the circle.
  5. Chain 2, and join with a slip stitch to the top of the beginning chain-3.

Round 2:

  1. Slip stitch into the next chain-2 space.
  2. Chain 3, work 2 double crochet stitches into the same space.
  3. Chain 2, and work 3 double crochet stitches into the same space.
  4. In the next chain-2 space, work 3 double crochet stitches, chain 2, and work 3 more double crochet stitches.
  5. Repeat step 4 for the remaining two chain-2 spaces.
  6. Join with a slip stitch to the top of the beginning chain-3.

Round 3:

  1. Slip stitch into the next two stitches and into the next chain-2 space.
  2. Chain 3, work 2 double crochet stitches into the same space.
  3. In the corner space (the next chain-2 space), work 3 double crochet stitches, chain 2, and work 3 more double crochet stitches.
  4. In the next chain-2 space, work 3 double crochet stitches.
  5. Repeat step 4 for the remaining two chain-2 spaces.
  6. In the final corner space, work 3 double crochet stitches, chain 2, and work 2 more double crochet stitches.
  7. Join with a slip stitch to the top of the beginning chain-3.

Finishing:

  1. Fasten off and weave in any loose ends using a tapestry needle.


Customization: Once you've mastered the basics, feel free to experiment with different yarn colors, stitch variations, and border options to add your personal touch to each square motif. With this easy crochet square motif pattern in hand, you're poised to embark on a journey of creativity. Whether you're a beginner looking to hone your skills or an experienced crocheter seeking a relaxing project, these square motifs offer endless possibilities. Create a collection of motifs that speak to your style, and watch as your creations blossom into stunning works of art. So gather your yarn and hook, find your crochet rhythm, and let the joy of crafting guide your hands as you create one charming square after another.

 Tutorial Video Here


Crochet the MOST BEAUTIFUL and Gorgeous Blanket Pattern


Unleash your creative prowess and embark on a journey of crafting with our most enchanting crochet blanket pattern. This exquisite masterpiece promises to cocoon you in warmth while adorning your space with unparalleled beauty.

Materials You'll Need:

  1. Yarn: Choose a yarn that matches your vision. Opt for soft, luxurious yarn for an extra touch of elegance.
  2. Crochet Hook: Select a hook size that complements your yarn. This will ensure your stitches are perfectly balanced.
  3. Scissors: A trusty pair for snipping and trimming yarn.
  4. Tapestry Needle: For weaving in those loose ends and adding those final touches.

Gorgeous Blanket Pattern:

Note: This pattern showcases a classic ripple design that's both timeless and captivating.

Foundation Row:

  1. Chain a multiple of your desired width + 2 additional chains.

Row 1:

  1. In the 3rd chain from the hook, work 2 double crochet stitches (dc).
  2. Skip 2 chains, then work a double crochet decrease (dcdec) over the next 3 chains.
  3. Repeat step 2 until you have 3 chains left.
  4. Work 1 dc into each of the last 3 chains.

Row 2:

  1. Chain 3 (this counts as your first double crochet of the row).
  2. Turn your work.
  3. Work 2 dc into the first stitch.
  4. Skip 2 stitches, then work a dcdec over the next 3 stitches.
  5. Repeat step 4 until you have 3 stitches left.
  6. Work 1 dc into each of the last 3 stitches.

Repeat Row 2:

  1. Continue repeating Row 2 until your blanket reaches your desired length.

Finishing:

  1. Fasten off and weave in any loose ends using a tapestry needle.

Customization: Feel free to customize your blanket by experimenting with color changes, yarn textures, and even adjusting the width of the ripple pattern. The result will be a one-of-a-kind creation that resonates with your personal style.


As you immerse yourself in the rhythmic dance of stitches, watch as the most beautiful and gorgeous crochet blanket pattern comes to life under your fingertips. With every loop and twist, you're not just crafting a blanket; you're weaving a tale of elegance and comfort. This blanket is more than just an accessory; it's a statement piece that reflects your dedication to the art of crochet. Whether draped over your favorite reading chair or elegantly folded at the foot of your bed, this masterpiece will be a testament to your creative spirit and your ability to transform yarn into a work of art. So, gather your materials, embrace the therapeutic rhythm of crochet, and let the beauty of your finished blanket envelop you in warmth and style.

 Tutorial Video Here


Sousplat, an American Game, an American Place


In the heart of an enchanting American haven, where the sun's warm embrace meets the tender whispers of the breeze, a timeless game blooms, known as Sousplat. This cherished tradition has
woven its threads into the very fabric of an American place, where laughter echoes and friendships flourish. Imagine a place where the meadows stretch as far as the eye can see, painted with the vibrant hues of nature's brush. Here, amid the soothing rustle of leaves and the gentle songs of birds, Sousplat takes center stage. It's a game that transcends generations, inviting souls of all ages to gather in the embrace of competition and camaraderie. As the sun dips low, casting a golden glow upon the landscape, the Sousplat board becomes a canvas of possibilities. Each player becomes an artist, moving their pieces with a blend of strategy and intuition, creating a masterpiece of moments. Laughter dances upon the air, harmonizing with the whispers of memories waiting to be made. Sousplat isn't just a game; it's an emotional journey. It's the laughter that rings out like wind chimes on a gentle breeze, the joy of a perfectly executed move, and the camaraderie that binds hearts together. It's a shared experience that etches itself into the tapestry of time, where victories are celebrated and defeats are embraced with grace.


In this American place, the beauty lies not only in the landscape but also in the connections forged. Underneath the starlit sky, as the game unfolds, something magical happens. Strangers become friends, friends become family, and the spirit of Sousplat weaves its threads of togetherness. As the night sky blooms with stars, the game reaches its crescendo. The air is filled with stories, victories, and shared dreams. The American place cradles these memories, holding them close to its heart, a testament to the moments of joy and bonding that Sousplat has gifted to those who partake. In the end, it's not about who wins or loses, but about the emotions that bloom like wildflowers in the hearts of the players. Sousplat is a journey of connection, a celebration of the human spirit's yearning for shared experiences. It's a reminder that amidst the hustle of life, we can find solace and joy in the simple act of play. So, let Sousplat's legacy continue to flourish in this American haven, where emotions run deep and memories are woven into the very essence of the land. It's a reminder that within the tapestry of life, it's the threads of love, laughter, and togetherness that make it truly beautiful.

Tutorial Video Here


Super Easy Crochet flower making


Crochet rug / easy / economical


Creating an easy and economical
crochet rug is a great project to add a cozy and handmade touch to your home.
Here's a step-by-step guide to help you make one:


Materials you'll need:


  • Crochet hook (appropriate size for your yarn)

  • Bulky or super bulky weight yarn in your desired
    color(s)

  • Scissors 

Instructions:


  1. Choose your yarn and hook:


    • Select a durable and thick yarn suitable for rugs,
      such as cotton or acrylic.

    • Choose a crochet hook size that complements your
      yarn to achieve the desired tension and drape.


  2. Start crocheting the rug:


    • Begin by making a slipknot and chaining the desired
      number of stitches for the width of your rug.

    • Work single crochet stitches in the second chain
      from the hook and in each chain across. This will be the first row of
      your rug.

    • Chain 1 and turn your work.


  3. Continue crocheting rows:


    • Work single crochet stitches in each stitch across
      the row.

    • Chain 1 and turn your work.

    • Repeat this row until your rug reaches the desired
      length. You can measure it as you go or use a predetermined measurement. 

  1. Change colors or add patterns (optional):


    • If you want to add color changes or patterns to
      your rug, you can do so by changing yarn colors or incorporating
      different stitch patterns.

    • For color changes, simply switch to a new color at
      the beginning of a row and continue with single crochet stitches.

    • For patterns, you can introduce textured stitches,
      such as popcorn stitch or bobble stitch, or incorporate different stitch
      patterns like shells or clusters.


  2. Finishing:


    • Once your rug has reached the desired size and
      you've added any desired color changes or patterns, fasten off the yarn
      and cut it, leaving a long tail.

    • Use a yarn needle to weave in any loose ends,
      ensuring a neat finish. 

Note: The size of your rug will
depend on the number of stitches and rows you crochet. You can adjust the
measurements to fit your desired rug size.


Creating a crochet rug is a
flexible project, and you can adjust the size, colors, and patterns to suit
your preferences and home decor. Additionally, you can experiment with
different stitch patterns or add fringe or tassels to enhance the design.


Enjoy the process of creating your
easy and economical crochet rug, and relish the satisfaction of adding a
handmade and cozy element to your living space!

Tutorial Video Here


Carpet in Crochet /Step by Step


Creating a crochet carpet is a
time-consuming but rewarding project. Here's a step-by-step guide to help you
make one:


Materials you'll need:


  • Crochet hook (appropriate size for your yarn)

  • Bulky or super bulky weight yarn in your desired
    color(s)

  • Scissors 


Instructions:


  1. Choose your yarn and hook:


    • Select a durable and thick yarn suitable for
      carpets, such as acrylic or wool blend.

    • Choose a crochet hook size that complements your
      yarn to achieve the desired tension and drape.


  2. Start crocheting the carpet:


    • Begin by making a slipknot and chaining the desired
      number of stitches for the width of your carpet.

    • Work single crochet stitches in the second chain
      from the hook and in each chain across. This will be the first row of
      your carpet.

    • Chain 1 and turn your work.


  3. Continue crocheting rows:


    • Work single crochet stitches in each stitch across
      the row.

    • Chain 1 and turn your work.

    • Repeat this row until your carpet reaches the
      desired length. You can measure it as you go or use a predetermined
      measurement. 

  1. Change colors or add patterns (optional):


    • If you want to add color changes or patterns to
      your carpet, you can do so by changing yarn colors or incorporating
      different stitch patterns.

    • For color changes, simply switch to a new color at
      the beginning of a row and continue with single crochet stitches.

    • For patterns, you can introduce textured stitches,
      such as popcorn stitch or bobble stitch, or incorporate different stitch
      patterns like shells or clusters.


  2. Finishing:


    • Once your carpet has reached the desired size and
      you've added any desired color changes or patterns, fasten off the yarn
      and cut it, leaving a long tail.

    • Use a yarn needle to weave in any loose ends,
      ensuring a neat finish. 

Note: The size of your carpet will
depend on the number of stitches and rows you crochet. You can adjust the
measurements to fit your desired carpet size.


Creating a crochet carpet requires
patience and dedication, as it can take a significant amount of time to
complete. It's recommended to work on it in sections or set aside dedicated
time to make progress.


Enjoy the process of creating your
crochet carpet, and have fun adding a cozy and handmade touch to your home
décor!

Tutorial Crochet Here


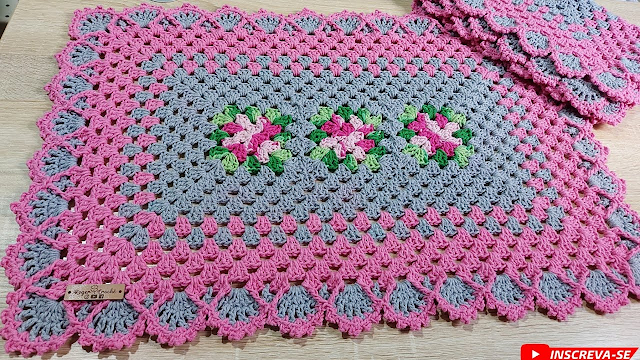
Sousplat in Crochet/Step by Step


Creating a crochet sousplat, or
placemat, is a fun and practical project. Follow these step-by-step
instructions to make one:


Materials you'll need:


  • Crochet hook (appropriate size for your yarn)

  • Worsted weight or bulky yarn in your desired color(s)

  • Scissors 


Instructions:


  1. Choose your yarn and hook:


    • Select a durable yarn suitable for placemats, such
      as cotton or acrylic.

    • Choose a crochet hook size that complements your
      yarn to achieve the desired tension and drape.


  2. Start crocheting the sousplat:


    • Begin by making a slipknot and chaining the desired
      number of stitches for the diameter of your sousplat.

    • Join the last chain with a slip stitch to form a
      ring.


  3. Round 1:


    • Chain 1 (does not count as a stitch).

    • Work single crochet stitches evenly around the ring.
      This will be the first round of your sousplat.

    • Join with a slip stitch to the first single crochet
      to complete the round. 

  1. Round 2:


    • Chain 1 (does not count as a stitch).

    • Work single crochet stitches in each stitch around,
      including the joining slip stitch from the previous round.

    • Join with a slip stitch to the first single crochet
      to complete the round.


  2. Repeat Round 2:


    • Continue repeating Round 2 until your sousplat
      reaches the desired size. This will depend on how large you want your
      placemat to be.


  3. Finishing:


    • Once your sousplat has reached the desired size,
      fasten off the yarn and cut it, leaving a long tail.

    • Use a yarn needle to weave in any loose ends,
      ensuring a neat finish. 

You have now completed a crochet
sousplat! Repeat these steps to create more placemats in different colors or
sizes. Crocheted sousplats can add a touch of elegance and creativity to your
dining table.


Feel free to experiment with
different stitch patterns, such as textured stitches or lace patterns, to add
more variety and visual interest to your sousplats. You can also personalize
them by adding decorative elements like crochet flowers, beads, or ribbons.


Enjoy the process of creating your
crochet sousplats, and have fun adding a beautiful and functional touch to your
dining experience!

Tutorial Video Here


VERY BEAUTIFUL CROCHET BAG


Creating a very beautiful and easy crochet bag for beginners
is an enjoyable project. Here's a step-by-step guide to help you make one:


Materials you'll need:


  • Crochet
    hooks (appropriate size for your yarn)

  • Worsted
    weight or bulky yarn in your desired color(s)

  • Scissors

  • Yarn
    needle


Instructions:


  1. Choose
    your yarn and hook:


    • Select
      a soft and sturdy yarn suitable for bags, such as cotton or acrylic.

    • Choose
      a crochet hook that complements your yarn weight to achieve the desired
      tension and drape.


  2. Determine
    the bag size and style:


    • Decide
      on the size and style of your crochet bag. You can choose a simple tote
      bag, a small clutch, or any other design that appeals to you.


  3. Start
    crocheting the bag:


    • Begin
      by making a foundation chain that matches the width of your desired bag.

    • Single
      crochet in the second chain from the hook and in each chain across. This
      will create the first row of single crochets.

    • Continue
      working single crochet stitches in each stitch across every row until you
      reach the desired height of the bag. You can adjust the height to suit
      your needs.


  1. Create
    handles (optional):


    • If
      you want handles for your bag, crochet a chain that is long enough to
      serve as the handle length.

    • Attach
      the chain to each side of the bag, sewing it securely with a yarn needle
      or slip stitching it to the bag.


  2. Finishing
    the bag:


    • Fasten
      off the yarn and cut it, leaving a long tail for sewing.

    • Fold
      the crocheted piece in half with the right sides facing each other.

    • Use
      a yarn needle to sew the side seams of the bag, stitching through both
      layers. Start from the bottom and sew up to the top, ensuring the handles
      are positioned correctly if you added them.


  3. Weave
    in any loose ends and trim excess yarn.


Congratulations! You have now completed a very beautiful and
easy crochet bag. Feel free to experiment with different colors, yarn types,
and stitch patterns to customize your bag further. You can add embellishments
such as buttons, flowers, or tassels to make it even more unique.


Enjoy using your crochet bag for carrying essentials, as a
stylish accessory, or as a thoughtful gift for someone special. Crocheting bags
is a versatile and rewarding skill that allows you to create practical and
beautiful items.

Tutorial Video Here


EASY WAY TO MAKE A BEAUTIFUL CROCHET DRAWSTRING BAG


Making a beautiful crochet
drawstring bag for beginners is a fun and rewarding project. Here's an easy
step-by-step guide to help you create one:


Materials you'll need:


  • Crochet hooks (appropriate size for your yarn)

  • Worsted weight or bulky yarn in your desired color(s)

  • Scissors

  • Yarn needle

  • Ribbon or cord for the drawstring


Instructions:


  1. Choose your yarn and hook:


    • Select a soft and durable yarn suitable for bags,
      such as cotton or acrylic.

    • Choose crochet hooks that complement your yarn
      weight to achieve the desired tension and drape.


  2. Determine the bag size:


    • Decide on the size of your drawstring bag based on
      its intended use, such as a small pouch or a larger bag for carrying
      essentials.

    • Consider the dimensions and capacity you want for
      your bag.


  3. Start crocheting the bag:


    • Begin by making a foundation chain that matches the
      width of your desired bag. Make sure it is a multiple of two.

    • Single crochet in the second chain from the hook
      and in each chain across. This will create the first row of single
      crochets.

    • Continue working single crochet stitches in each
      stitch across every row until you reach the desired height of the bag.


  4. Create the drawstring casing:


    • Once the bag reaches the desired height, fold the
      top edge down to the inside of the bag to create a fold or casing for the
      drawstring.

    • Single crochet evenly along the folded edge to
      secure it in place, creating the drawstring casing. You can space the
      single crochet stitches about half an inch apart. 

  1. Finishing the bag:


    • Fasten off the yarn and cut it, leaving a long tail
      for sewing.

    • Fold the bag in half with right sides facing each
      other.

    • Use a yarn needle to sew the side seams of the bag,
      stitching through both layers. Start from the bottom and sew up to the
      drawstring casing.

    • Turn the bag right side out.


  2. Attach the drawstring:


    • Thread a ribbon or cord through the drawstring
      casing, using a safety pin or yarn needle to help guide it through.

    • Make sure the drawstring is long enough to gather
      and tie the bag closed. You can leave extra length for decorative
      purposes.

    • Tie a knot or bow at each end of the drawstring to
      secure it in place.


  3. Weave in any loose ends and trim excess yarn.


You've now completed an easy and
beautiful crochet drawstring bag! Feel free to personalize it by adding
embellishments, such as crochet flowers, buttons, or beads, if desired.


Enjoy the process of creating your
crochet drawstring bag and have fun using it for various purposes like storing
small items, gifting, or as a stylish accessory.

Tutorial Video Here


LEARN TO MAKE CROCHET BAGS


Learning to make crochet bags can
be a rewarding and creative endeavor. Here's a general guide to help you get
started:


Materials you'll need:


  • Crochet hooks (appropriate size for your yarn)

  • Worsted weight or bulky yarn in your desired color(s)

  • Scissors

  • Yarn needle

  • Bag handles, buttons, or other embellishments
    (optional)


Instructions:


  1. Choose your yarn and hook:


    • Select a sturdy and durable yarn suitable for bags,
      such as cotton or acrylic.

    • Choose crochet hooks that complement your yarn
      weight to achieve the desired tension and drape.


  2. Decide on the bag style and size:


    • Determine the style and purpose of the bag you want
      to create, such as a tote bag, shoulder bag, or clutch.

    • Consider the size and dimensions of the bag based
      on its intended use.


  3. Find or create a pattern:


    • Look for crochet bag patterns that match the style and
      design you want.

    • Alternatively, if you're comfortable with designing
      your own bag, create a pattern based on your measurements and desired
      style. This involves sketching a basic bag shape and calculating the
      stitch counts for each section.


  4. Start crocheting the bag:


    • Follow the instructions provided in your chosen
      pattern or use your own design.

    • Typically, you will start by crocheting the bottom
      of the bag, working in rounds or rows to create the base.

    • Continue crocheting upward, adding stitches or
      increasing as needed to shape the sides of the bag.


  1. Customize the design:


    • Feel free to experiment with different stitch
      patterns, textures, or color changes to make your bag unique and visually
      appealing.

    • Add pockets, buttons, or other embellishments to
      enhance the functionality and aesthetics of the bag.


  2. Finish off the bag:


    • Once you have completed the main body of the bag,
      fasten off the yarn and cut it, leaving a long tail.

    • Use a yarn needle to weave in any loose ends,
      ensuring a neat finish.


  3. Optional: Add handles or closures:


    • If desired, attach bag handles using the yarn
      needle and yarn. You can purchase pre-made handles or create your own
      using crochet or fabric strips.

    • Alternatively, you can add a button closure,
      zipper, or other fastening method based on your bag design.


  4. Weave in any remaining loose ends and trim excess
    yarn.


Remember, the specific steps and
details may vary depending on the chosen pattern or your own design. It's
important to follow the instructions provided and make any necessary
adjustments to achieve the desired size, style, and functionality of your
crochet bag.


Enjoy the process of creating
crochet bags and have fun experimenting with different patterns, yarns, and
embellishments. The results can indeed be incredibly beautiful and personalized
to your taste!

Tutorial Video Here


Beautiful crochet rose flower motif making


Creating a beautiful crochet rose
flower motif is a lovely project. Follow these step-by-step instructions to
make one:


Materials you'll need:


  • Crochet hook (appropriate size for your yarn)

  • Worsted weight yarn in your desired rose color

  • Scissors

  • Yarn needle


Instructions:


  1. Start with a slipknot:


    • Create a slipknot by making a loop with the yarn
      end, passing the working end through the loop, and pulling it tight. This
      will secure the yarn on your crochet hook.


  2. Chain stitches:


    • Make a chain of 51 stitches. This will serve as the
      foundation chain for your rose.


  3. Create the center of the rose:


    • Skip the first three chains from the hook and work
      a single crochet stitch into the fourth chain. This will create the
      center of the rose.


  4. Begin forming the petals:


    • Chain 2.

    • Skip one chain from the foundation chain and work 1
      double crochet stitch into the next chain.

    • Chain 2.

    • Skip one chain from the foundation chain and work a
      slip stitch into the next chain.

    • Repeat this pattern (1 double crochet, chain 2,
      skip 1 chain, slip stitch) until the end of the foundation chain. 


  1. Shaping the petals:


    • Gently pull the foundation chain to gather the
      petals, creating a circular shape.

    • Roll the rose petals slightly to give the flower
      depth and dimension.


  2. Finishing the rose:


    • Fasten off the yarn by cutting it, leaving a long
      tail for sewing.

    • Starting from the outer edge of the rose, tightly
      roll the flower, securing it with the long tail of yarn as you go.

    • Use a yarn needle to sew the rolled rose in place,
      stitching through the layers to secure them together.


  3. Weave in loose ends:


    • Use a yarn needle to weave in any loose ends to
      ensure a neat finish.


You have now completed a beautiful
crochet rose flower motif! Repeat these steps to create more rose motifs and
use them for various projects such as appliques, hair accessories, brooches, or
as decorative elements on garments, blankets, or pillows.


Feel free to experiment with
different yarn weights, colors, and sizes to create a variety of crochet rose
flower motifs. Enjoy the process and have fun creating your own stunning
crochet roses!

Tutorial Video Here


My Blog List

We blog to share about Knitting and Crochet contents

Popular Posts