
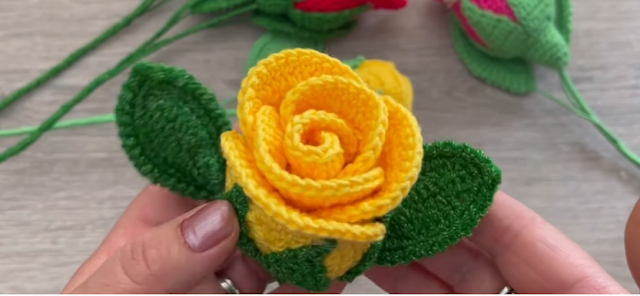
Crocheting a long stem rose is a
beautiful project that can be used as a decorative element or a gift. Here's a
step-by-step guide to help you crochet a long stem rose:
Materials you'll need:
- Crochet hook (appropriate size for your yarn)
- Worsted weight or sport weight yarn in your desired
colors (green for the stem and leaves, and any color for the rose petals) - Scissors
- Yarn needle
- Fiberfill or stuffing (optional)

Instructions:
- Crocheting the stem:
- Start with the stem by chaining a length that
matches the desired length of your rose stem. - Single crochet in each chain stitch, working your
way down the chain to create the stem. - Continue single crocheting in each stitch until you
reach the end of the chain. - Crocheting the leaves:
- To crochet the leaves, start by chaining a length
that matches the desired size of the leaf. - Single crochet in the second chain from the hook,
and continue single crocheting in each chain stitch. - Once you reach the end of the chain, chain one and
turn your work. - Single crochet in each stitch across the row, and
repeat this row until you have the desired number of leaves. - Shaping the leaves:
- To give the leaves a curved shape, fold them in
half lengthwise and use a yarn needle to sew the edges together, creating
a curved leaf shape. You can stuff the leaves with a bit of fiberfill or
stuffing before closing them up if you want them to be more
three-dimensional. - Crocheting the rose petals:
- Start with a magic ring or chain 4 and join with a
slip stitch to form a ring. - Chain 3 (counts as the first double crochet).
- Work a set of stitches into the ring: 1 double
crochet, 1 half double crochet, 2 single crochets, 1 half double crochet,
2 double crochets. This forms one petal. - Slip stitch into the ring to close the petal.
- Repeat the above steps to create additional petals.
Typically, a rose has 5-7 petals, but you can add more if desired. - Assembling the rose:
- Take one petal and roll it tightly to create the
center of the rose. Use a yarn needle to secure the rolled petal,
stitching it in place. - Continue adding petals around the center,
overlapping them slightly and stitching them in place with the yarn
needle. Arrange the petals to create the desired shape and fullness of
the rose. - Attaching the rose to the stem:
- Once the rose is assembled, use the yarn needle to
attach it to the top of the stem. Secure it by stitching through the base
of the rose and around the stem. - Attaching the leaves:
- Attach the leaves to the stem by using the yarn
needle to stitch them in place at the desired positions along the stem.
Arrange them evenly around the stem. - Finish off and weave in ends:
- Fasten off the yarn and cut it, leaving a long
tail. - Use a yarn needle to weave in any loose ends,
ensuring a neat finish.


crocheting a long stem rose. Customize the colors and sizes to your preference
and enjoy your beautiful crochet rose!
No comments:
Post a Comment